
Create your own webpage using GitHub pages
In this assignment you will:
- Make a
GitHubaccount - Create a new repository in
GitHub - Build a webpage using
GitHub pages - Learn how to use
MarkdownandHTML
For this first assignment, you’re going to create a personal webpage using GitHub pages and the popular markup language Markdown. You’ll use this webpage to share some biographical information and a photo of yourself. Throughout this internship, you’ll be updating your webpage with links to assignments, team project progess, and other work that you’ll complete.
While not required for this first assignment, you can read more about
gitandGitHubin our open Earth Data Science textbook.
Step 0: Create a GitHub account
Use this link to create a free GitHub account. If you already have a GitHub account, there is no need to create a new account!
Protip: Your GitHub username should be short and something that you can easily remember and identify with.
Step 1: Create a new repository
Once you have a GitHub account, get started by creating a new repository for your webpage. There are several ways to accomplish this task.
To do this you can:
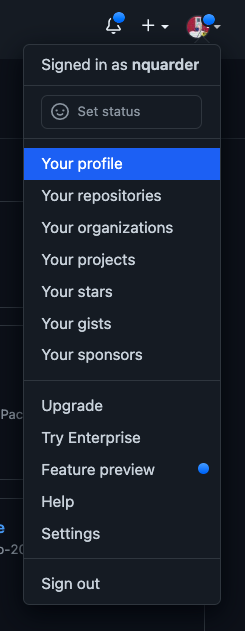
- Navigate to your profile page
- Click on the dropdown arrow next to your profile photo in the upper right corner
- Select Your profile
Select the Repositories tab from the menu near the top of the page.

NOTE: A repository contains all of your project’s files and each file’s revision history. You can discuss and manage your project’s work within the repository.
From here, you can select the green New button on the right to get started.

Give your new repository a name that is descriptive so you can easily search for it later on.
Something like username-esiil-stars-webpage would be appropriate.
- You can give your repository a description
- Make your repository Public
- Check the box to add a
READMEfile to your repository (you will edit this later using Markdown) - You can skip adding the gitignore for now
- Choose a License for your repository
- Once you’re done, select the green Create Repository button at the bottom of the page
Step 2: Create a new index.md file
You will create a new file called index.md that will serve as the content for your webpage. To do this you can :
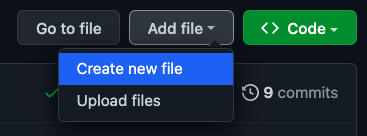
- Select the Add file button from the menu on the right
- Select Create new file.
From here you will create a new Markdown file called index.md
Add the following Markdown header text to your index file:
## ADD YOUR NAME HERE
NOTE: You can change this text to your name or something else. This is your website, and you’ll always be able to come back and make edits!
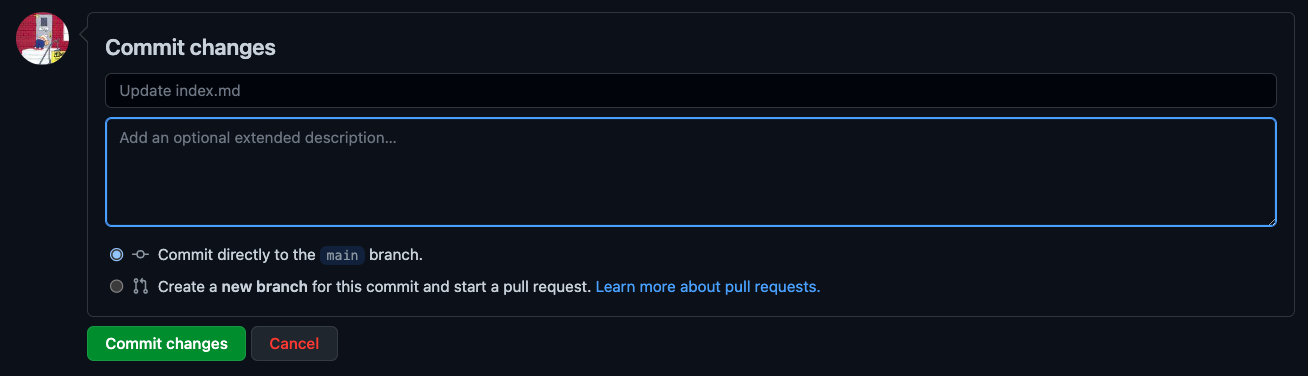
Step 3: Commit changes
Now that you’ve created your index.md file and added some text, you’ll want to commit changes to your repository. Add an optional extended description of your changes and then select the green Commit changes button at the bottom of the page.
Step 4: Build your webpage
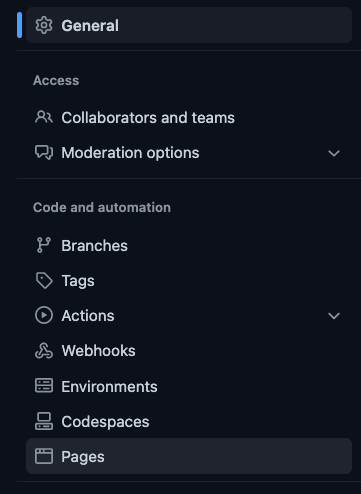
Once you’ve created your index.md file you’re ready to build your webpage. From your repository, select the Settings tab from the right end of the menu.

From here, scroll down the menu on the left and select Pages.
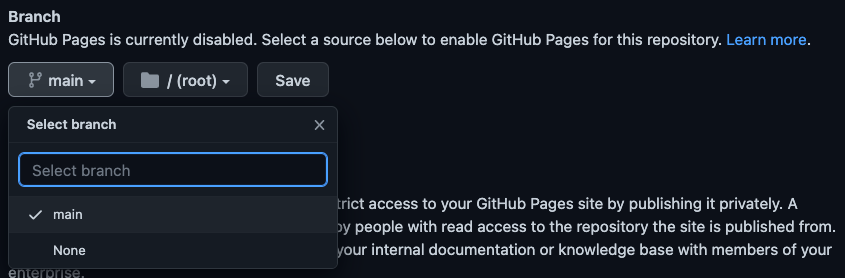
Now you’ll want to select the main option under the Branch heading and then select Save.
Step 5: Check on your webpage
Check in on your webpage to see how it is doing by opening the link https://username.github.io/repository-name/ in a new tab in your web browser. Here, you’ll need to replace username with your GitHub username and repository-name with the name of the repository that you created above. Once you see your name (or whatever text you added to your index.md file in Step 2) appear as a Markdown header, then you know your webpage is working!
NOTE: Sometimes your webpage can take a minute or so to build so be patient and refresh every 30 seconds or so until the page is done building.
Step 6: Start adding information to your webpage
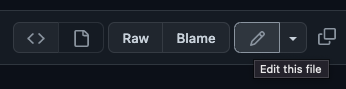
Now you’re ready to start adding some more information to your webpage. Navigate back to your repository and open the index.md file that you just created. You will edit this page by clicking on the pencil icon on the right of the menu near the top of your repository page on GitHub. You will use Markdown and Hypertext Markup Language (HTML) to add text, links, images, and other content to your webpage. Markdown and HTML are both common markup langauges, and have wide application including formatting text, report writing, and website development.
Here you should think about adding the following information to your webpage:
- A photo of yourself
- Your name (as a header) if you haven’t already
- A bulleted list of links to your public contact information (email, GitHub account, LinkedIn account, social media accounts, etc.)
- The name of the school that you attend; your year; your major
- A biographical paragraph about yourself
- What you’re excited about learning as an ESIIL Stars intern
- Questions that you’d like to answer using Earth Data Science
NOTE: You will want to review the Markdown Basic Syntax guide to help you format your webpage using
MarkdownandHTML. We also have a lesson in our Earth Data Science textbook that may be helpful.When adding links and images to your webpage, you may appreciate the added control of Hypertext Markup Language (HTML) over Markdown.
Get creative here! Add some fun and interesting things about yourself. Pictures of pets are also always a major bonus! Anything you want to add here to help tell your story, please go ahead.
IMPORTANT: Always remember to commit changes so that your updated content gets added to your webpage.
Step 7: Post links to your webpage and repository on Discourse
Once you’re all done you can post links to your new webpage and GitHub repository on the course Discourse page here.
- Create a new topic (see the
+New Topicbutton in the upper right) - Give your topic a descriptive name
- Share links to your
- Webpage:
https://username.github.io/repository-name/ - GitHub repository:
https://github.com/username/repository-name
- Webpage:
- Review the webpages posted by your ESIIL Stars colleagues
- Reply to your classmates’ posts and tag them in your responses. Ask them questions, or give them feedback, based their webpage or code (things they’re interested in; things they hope to get out of this internship; areas that you can collaborate; common interests; questions about their code; etc.)
- Try to connect with at least one intern from each of the three participating schools (OLC, MSU, UTTC)
Don’t forget to add a link to your new webage to your resumé or CV! Or, think about how your could turn your resumé into a webpage.